Connect
This tutorial explains how to connect to external system in Choreonoid.
Load sample project
Select “File” -> “Open Project” menu item and open “OpenRTM-PA10Pickup.cnoid” under “share/project” folder.
Configuration for your own project
If you want to edit motion sequence of your own robot model, apply following configuration.
From main menu:
- Create World item (select “File” -> “New...” -> “World”).
- Load model item (select “File” -> “Open...” -> “OpenHRP Model File”).
- Create BodyRTC item (select “File” -> “New...” -> “BodyRTC”).
If you require physics simulation, add following additional items:
- Load floor model item (select “File” -> “Open...” -> “OpenHRP Model File”).
- Create AISTSimulator item (select “File” -> “New...” -> “AISTSimulator”).
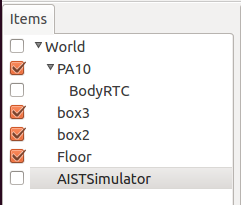
In item panel:
Drag and drop the items to following order (model and simulator item must belong to the world item and BodyRTC item must belong to model item).
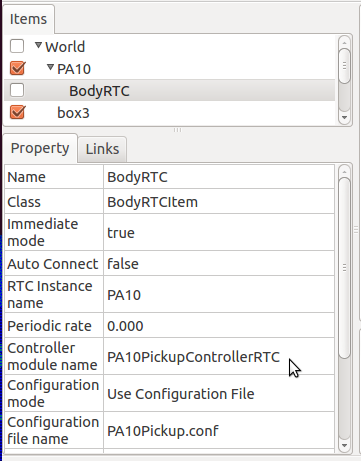
Click BodyRTC item in the item panel and edit the property as:
- Controller module name: PA10PickupControllerRTC
- Configuration mode: Use Configuration File
- Configuration file name: PA10Pickup.conf
Create configuration file named “PA10Pickup.conf” with following content:
1 2 3 4 5 6 | in-port = u_in:JOINT_TORQUE
out-port = u_out:HAND_R,HAND_L:JOINT_TORQUE
out-port = q:JOINT_VALUE
connection = u_out:u_in
connection = u_in:u_out
connection = q:q
|
Above example create instance of PA10PickupControllerRTC and connect each ports to the robot model.
You can also use the components comes from hrpsys-base or create the component of your own (see Connect).
